8 Simple Steps to Install Brick Borders
Brick borders anchor garden beds with the permanence of fired clay and the geometry of deliberate design. They define the boundary between lawn and loam, preventing grass rhizomes from invading mulch zones while providing a mowing strip that eliminates trimmer damage to plant stems. Learning how to install brick borders transforms amateur beds into professional-grade landscapes, combining structural integrity with thermal mass that moderates root-zone temperatures through diurnal cycles. The process demands attention to grade, substrate compaction, and joint spacing, but the result endures for decades with minimal maintenance.
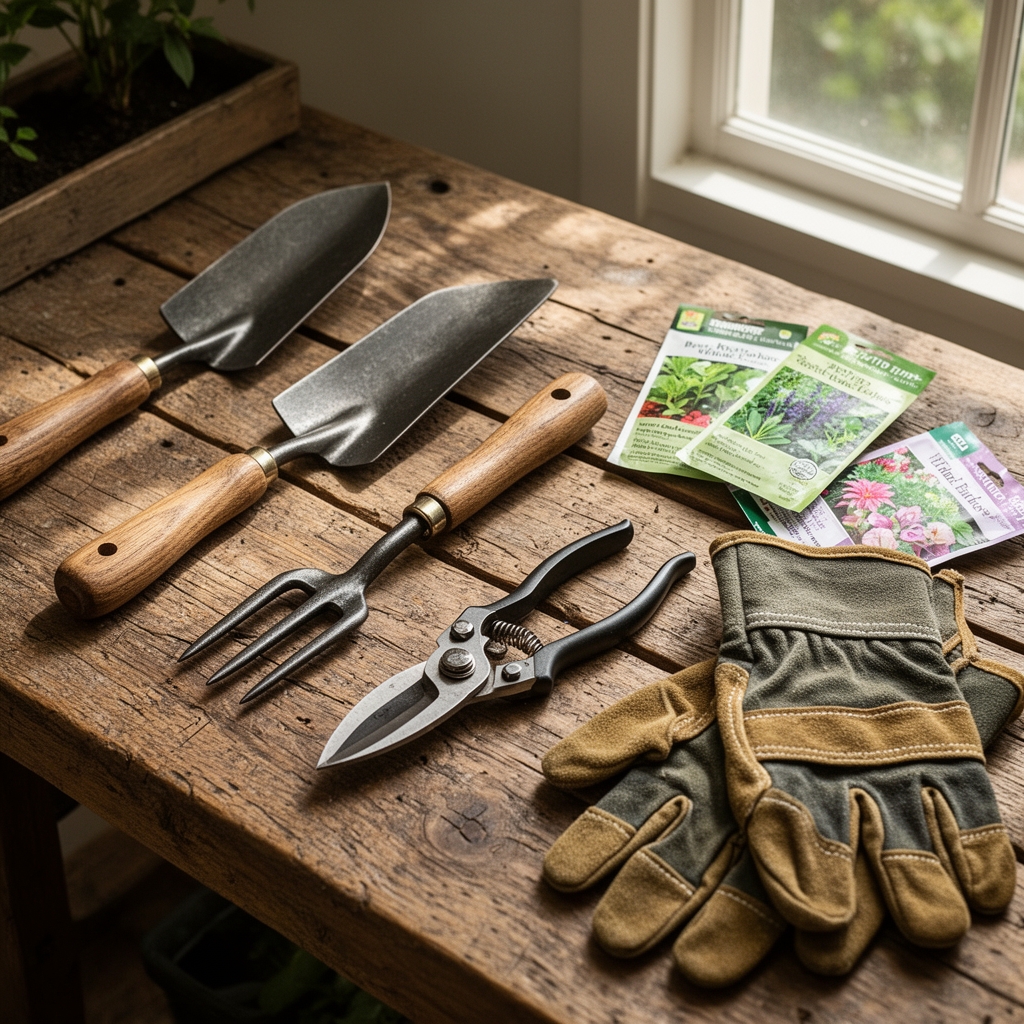
Materials
Select hard-fired clay bricks rated for ground contact, avoiding structural bricks that spall under freeze-thaw cycles. Calculate 4.5 standard bricks (3.625 x 2.25 x 8 inches) per linear foot for soldier-course installation, 7.2 bricks per linear foot for basket-weave patterns.
Substrate preparation requires three distinct layers. The base layer consists of crushed limestone screenings (3/4-inch minus) compacted to 95% Proctor density, providing a cation exchange capacity that stabilizes pH between 6.8 and 7.2. This alkaline buffer counters soil acidity from decomposing organic mulches. Apply a 2-inch leveling course of mason sand (ASTM C144 compliant) with particle sizes between 0.02 and 0.08 inches. The sand facilitates brick leveling while allowing capillary water movement.
Joint stabilization demands polymeric sand rated for gaps between 1/16 and 2 inches. Traditional masonry sand migrates during heavy precipitation events. Polymeric formulations contain Portland cement and proprietary binding agents that cure when activated by water, creating a semi-permeable joint that resists ant excavation and weed germination.
Edge restraint options include 10-inch galvanized steel spikes for residential installations, or commercial-grade aluminum edging (0.125-inch thickness) secured at 36-inch intervals. The restraint prevents lateral creep from frost heaving and mower impact.
Timing
Install brick borders when soil moisture content allows proper compaction without creating hardpan layers. In USDA Hardiness Zones 3-5, schedule installation between May 15 and September 30, after frost has left the ground to a depth of 18 inches and before autumn rains elevate water tables. Zones 6-7 extend the window from April 1 through October 31. Zones 8-10 permit year-round installation, though summer installations in these zones require afternoon shading of mortar joints if using wet-set methods.
Avoid installation when soil temperatures drop below 50°F at 6-inch depth. Cold substrate prevents proper curing of polymeric sand binders and compromises compaction density. Schedule projects during three-day weather windows with less than 30% precipitation probability and daytime temperatures between 60-85°F.
Phases

Layout and Excavation
Mark border lines using landscape marking paint, maintaining curves with minimum 36-inch radii to prevent awkward brick angles. Excavate a trench 6 inches deep and 10 inches wide for soldier-course borders, 8 inches deep for mortared applications. Trench width accommodates the brick dimension plus 2 inches of lateral adjustment. Remove all organic debris including roots larger than 1/4 inch diameter, as decomposition creates voids that cause settling. Slope trench bottoms 1/8 inch per foot away from structures to direct subsurface water.
Pro-Tip: Spray trench bottoms with 2% glyphosate solution 48 hours before base installation to suppress perennial weed rhizomes, particularly quackgrass (Elymus repens) and nutsedge (Cyperus species). This prevents auxin-driven shoot emergence through joints.
Base Installation
Pour crushed limestone to 3-inch depth. Compact using a plate vibrator (5,000-7,000 pounds per square foot force) in two passes, adding material between passes to achieve final 2-inch compacted thickness. Proper compaction eliminates air voids that exceed 8% by volume. Verify level using a 4-foot straightedge and torpedo level, maintaining grade tolerance within 1/4 inch per 10 feet.
Spread mason sand in 1.5-inch lifts. Screed using a notched 2×4 that rides on trench edges, creating a uniform surface 1/8 inch above finished brick height to account for settling during installation. Mist sand lightly to improve cohesion without saturating.
Pro-Tip: Incorporate mycorrhizal fungi inoculum (Glomus intraradices) into the sand layer where border abuts planting beds. Hyphal networks extend 8 inches laterally, improving phosphorus uptake for adjacent ornamentals in soils with available P below 25 ppm.
Brick Placement
Set bricks on sand bed with 3/8-inch joints, using a rubber mallet to seat each unit. Tap centers, not edges, to prevent fracturing. Check level every third brick using a 24-inch level oriented both parallel and perpendicular to border. Adjust by adding or removing sand beneath individual bricks rather than tilting.
For curves, widen outer joints to 5/8 inch while maintaining inner joints at 1/4 inch. This differential prevents compression buckling on the inner radius. Stagger vertical joints in stacked courses by half-brick increments to distribute load.
Pro-Tip: Orient bricks with longer dimension perpendicular to lawn edge (soldier course) to create 8-inch barrier against rhizomatous grass species. This depth exceeds the 4-6 inch rooting zone of Kentucky bluegrass (Poa pratensis) and perennial ryegrass (Lolium perenne).
Joint Filling
Sweep polymeric sand across surface, working diagonally to force material into joints. Make three passes, vibrating with plate compactor on lowest setting (3,000 pounds force) after the second pass. Joints should be filled to within 1/8 inch of brick tops. Remove all surface residue with leaf blower before activation.
Activate with fine mist spray, wetting joints without flooding. Polymeric binders require 1-2 hours to begin curing. Prevent foot traffic for 24 hours, vehicle traffic for 72 hours.
Troubleshooting
Symptom: Brick heaving in 2-4 inch columns
Solution: Frost lens formation beneath inadequately compacted base. Excavate affected section, increase base depth to 4 inches, compact to 97% Proctor density. In Zones 3-4, extend base depth to 6 inches below frost line.
Symptom: Joint sand disappearing within 6 months
Solution: Ant excavation (Lasius, Formica species) or insufficient polymeric sand activation. Re-apply polymeric product, increase water activation by 50%, ensure 2-hour cure time before second misting. For persistent ant issues, apply bifenthrin granules (0.2% concentration) to adjacent soil.
Symptom: White efflorescence on brick faces
Solution: Soluble salt migration from portland cement in polymeric sand or mortar. Appears during first wet season, intensity decreases over 18 months. Accelerate removal by scrubbing with 10% muriatic acid solution, rinse thoroughly. Prevent by sealing bricks with siloxane penetrating sealer (5% solids concentration).
Symptom: Bricks rotating or tipping after 1-2 years
Solution: Insufficient edge restraint or lateral soil pressure. Install aluminum edging along lawn side, anchored at 24-inch intervals. Backfill planting bed side to match brick top elevation, preventing cantilever stress.
Symptom: Moss colonization in shaded joints
Solution: Moisture retention in northern or eastern exposures. Moss (Bryophyta division) thrives in joints with pH above 6.5 and consistent moisture. Apply copper sulfate solution (1 tablespoon per gallon water), or increase joint sand height to promote faster drying.
Maintenance
Apply 0.5 inches of water weekly during establishment phase (first 60 days) to settle substrate and promote compaction. After establishment, borders require no irrigation.
Remove organic debris from joints monthly during growing season. Fallen leaves decompose into humic acids that reduce polymeric sand pH below 5.0, weakening binding agents.
Reapply polymeric sand every 4-6 years in high-traffic areas, every 8-10 years in protected locations. Indicators for reapplication include joint depth recession exceeding 1/2 inch or weed germination density above 3 plants per linear foot.
Seal bricks every 5 years with breathable siloxane sealer to prevent water absorption above 3% by weight. Excessive absorption accelerates spalling in Zones 3-6 where freeze-thaw cycles exceed 40 annually.
Power wash at 1,200 PSI maximum every 3 years to remove atmospheric deposition and biological films. Higher pressures erode mortar and polymeric joints.
FAQ
How deep should the base be for brick borders?
Compact 2 inches of crushed limestone beneath 1.5 inches of sand for total excavation depth of 6 inches in Zones 5-10. Increase limestone base to 4 inches (8-inch total excavation) in Zones 3-4 where frost penetrates below 24 inches.
Can I install brick borders directly on soil?
Direct soil contact causes differential settling and weed intrusion. Minimum installation requires 1 inch of compacted limestone and 1 inch of sand. Omitting base layers reduces lifespan from 25+ years to 3-5 years.
What is the cost per linear foot for DIY installation?
Materials cost $4.80-$6.50 per linear foot: bricks ($2.40-$3.60), base stone ($0.80), sand ($0.60), polymeric sand ($1.00-$2.00), edging ($0.50). Tool rental (compactor, level) adds $75-$125 per project.
How do brick borders affect soil temperature?
Brick thermal mass absorbs solar radiation, elevating adjacent soil temperature 3-7°F during spring and fall. This extends growing season 7-14 days for warm-season annuals planted within 12 inches of south-facing borders.
Should bricks be mortared or dry-set?
Dry-set with polymeric sand allows individual brick replacement and accommodates minor ground movement. Mortar provides superior stability but requires concrete footing, increasing installation cost 200-300% and complicating future modifications.