10 Simple Steps to Build a Bat House
Crushing a handful of friable loam reveals the gritty texture of sand and the slickness of silt; it is the smell of Geosmin and active microbial life. This tactile feedback confirms the soil is ready for the season. Integrating bats into your garden ecosystem via specific steps to build a bat house serves as a biological control mechanism for nocturnal insect populations. A single colony of Big Brown Bats (Eptesicus fuscus) can consume thousands of beetles and moths in a single night. This predation reduces the larval pressure on your crops; it protects the turgor pressure of your leafy greens by preventing root-feeding grubs and foliar damage. Success requires precision in construction and placement to mimic the thermal dynamics of a hollow tree or loose bark.
Materials:

While the structure is timber, the surrounding environment must be optimized. The soil beneath the bat house should maintain a **pH of 6.0 to 7.0** to support the specific flora that attracts nocturnal pollinators. Use a **10-10-10 NPK ratio** for general garden maintenance in this area; however, avoid high-nitrogen synthetic fertilizers that can lead to salt accumulation in the rhizosphere. The wood for the house must be rough-cut cedar or exterior-grade plywood. Avoid pressure-treated lumber; the chemicals used in the pressure-treatment process are toxic to the sensitive respiratory systems of chiropterans. Use **0.125-inch plastic mesh** or heavy horizontal scoring (spaced **0.25 to 0.5 inches apart**) on the interior surfaces to provide the necessary grip for roosting.
Timing:
Installation should occur before the spring emergence in Hardiness Zones 4 through 9. In colder climates (Zones 3-5), the house must be mounted by late March to ensure it is available when bats exit hibernation or return from migration. This timing aligns with the biological clock of your garden; as soil temperatures reach 50 degrees Fahrenheit, the transition from dormancy to the vegetative stage begins for many perennial species. Installing the house during this window ensures that the bats are established before the first peak of insect activity. In warmer climates (Zones 8-10), installation can happen year-round, but late winter remains the most effective period for recruitment.
Phases:

Sowing the Structural Foundation
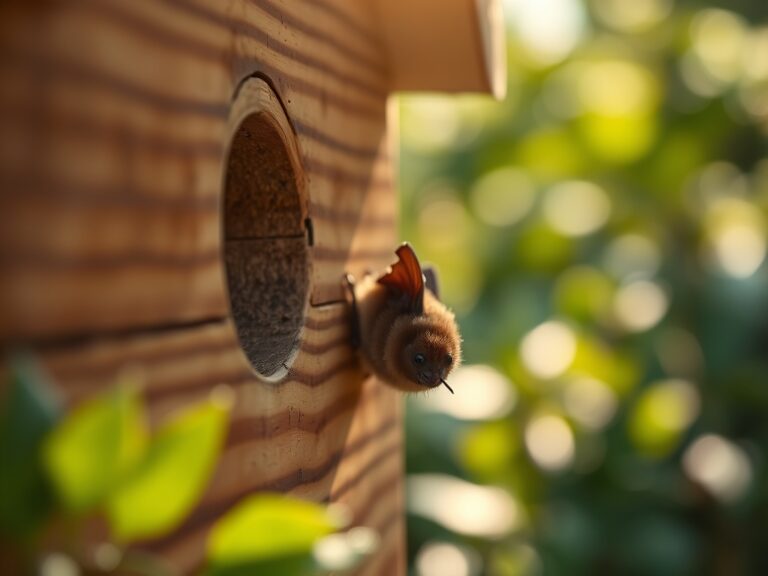
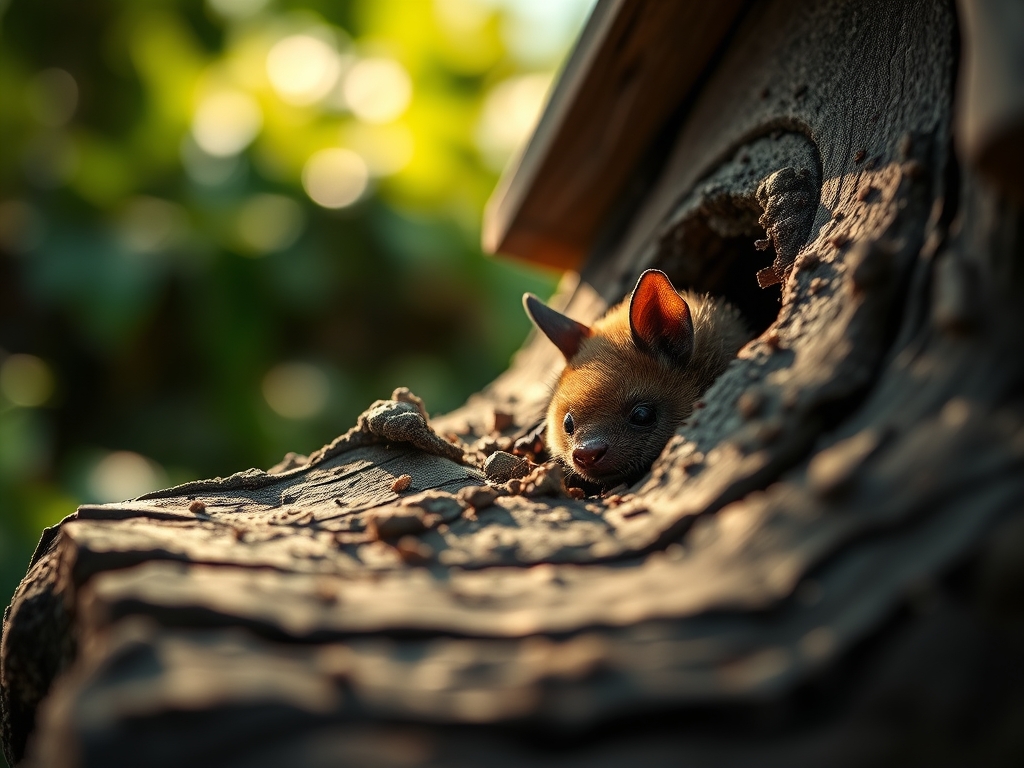
The first of the steps to build a bat house is cutting the panels. The backboard should be 24 inches wide and 32 inches tall. The front panels should be cut to create a 0.75-inch to 1-inch roosting chamber. Any gap wider than 1.5 inches will likely be colonized by wasps or squirrels rather than bats. Seal all exterior joints with silicone caulk to prevent drafts and maintain internal heat.
Pro-Tip: Maintaining internal temperatures between 80 and 100 degrees Fahrenheit is critical for pup development. This is a matter of thermal mass; dark exterior stains (water-based) help the structure absorb solar radiation during the photoperiod.
Transplanting to the Mounting Site
Mount the house at least 12 to 20 feet above the ground. It should be placed on a pole or the side of a building rather than a tree. Trees provide too much shade and offer easy access for predators like domestic cats or owls. The house must face South or Southeast to maximize sun exposure.
Pro-Tip: Bats require a clear "drop zone" of at least 20 feet of open space for takeoff. This relates to their unique morphology; they utilize gravity to achieve the initial airspeed required for flight before their pectoral muscles take over.
Establishing the Colony
Once mounted, the area surrounding the base should be planted with night-blooming species like Oenothera biennis. This creates a localized insect biomass that encourages the bats to investigate the new roost. Monitor the base of the house for guano; these small, friable pellets are rich in nitrogen and can be incorporated back into the soil to improve the Cation Exchange Capacity (CEC).
Pro-Tip: Avoid using high-intensity localized lighting near the house. Artificial light disrupts the bats' circadian rhythms and can lead to premature senescence of the colony as they seek darker, more secure roosts.
The Clinic:
Symptom: Bats are present but leave after a few days.
Solution: Check for internal drafts. Use a smoke pencil to identify leaks in the roof or side joints. Seal with non-toxic caulk.
Symptom: Wasp or hornet infestation.
Solution: Ensure the roosting chamber is no wider than 1 inch. Use a long-handled brush to clear nests in the winter when the house is vacant.
Symptom: Nitrogen chlorosis in plants directly under the house.
Solution: Excessive guano can burn roots due to high urea content. Dilute the area with 1 inch of water or scrape and compost the guano before re-applying it as a top-dressing.
Symptom: Peeling exterior finish.
Solution: Re-coat with a water-based, low-VOC dark stain. Avoid oil-based paints that off-gas and irritate the bats' membranes.
Maintenance:
Inspect the structure annually in December or January. Use a soil moisture meter to ensure the ground beneath the house remains hydrated; dry, dusty earth can reflect heat upward and destabilize the internal temperature of the house. Use a hori-hori knife to remove invasive vines that may attempt to climb the mounting pole. Ensure the mounting hardware is tight; wind-induced vibrations can cause a colony to abandon a site. If the house is mounted on a wooden pole, check for signs of rot at the soil line.
The Yield:
The primary yield is the reduction in pesticide requirements and the production of high-quality organic fertilizer. Guano typically tests at a 10-3-1 NPK ratio. Harvest guano by placing a tray or tarp beneath the house during the active season. To maintain "day-one" freshness and potency, store the collected guano in a dry, ventilated container. When applying to the garden, scratch it into the top 2 inches of soil to prevent nitrogen volatilization. This nutrient boost increases the osmotic potential of the plants; it allows them to draw more water and minerals from the rhizosphere.
FAQ:
What is the best height for a bat house?
Mount the house at least 12 to 20 feet above the ground. This height protects the colony from terrestrial predators and provides the necessary vertical clearance for the bats to drop into flight upon exiting the roosting chamber.
Which direction should the bat house face?
In most temperate climates, the house should face South or Southeast. This orientation ensures the structure receives at least 6 to 8 hours of direct sunlight; this is necessary to maintain internal temperatures above 80 degrees Fahrenheit.
Can I paint my bat house?
Yes, use a dark-colored, water-based stain or outdoor latex paint. Avoid dark colors in extremely hot climates (Zone 9-10) where a medium-brown may be better. Never use lead-based or oil-based products that emit toxic fumes.
How long does it take for bats to move in?
It typically takes 1 to 2 years for a colony to find and adopt a new house. Success rates increase if the house is located within 0.25 miles of a permanent water source like a pond or stream.